
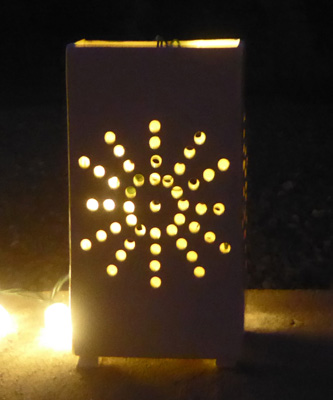
I had also thought that a single mini Christmas light might do the job to light it up too. I was wrong there. I turns out you need a full C9 (old fashioned big Christmas bulb size) to light it up.
I had made a hole in the bottom to thread the bulb through but it wasn't big enough for the C9. Here it is with the bigger bulb draped in from the back.
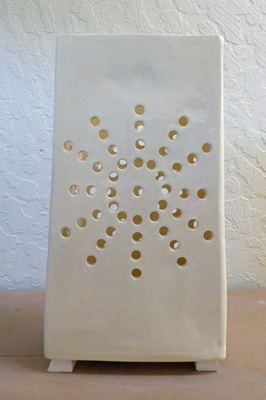
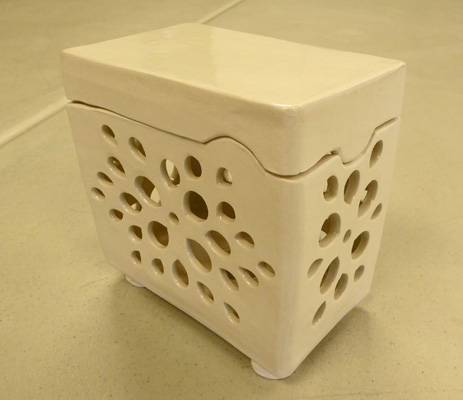
So armed with these two bits of information I made the next luminaria in early January 2020 this time with a lid, an additional 2 rows of holes near the bottom to emit more light and a big enough hole in the bottom for the bigger bulb.
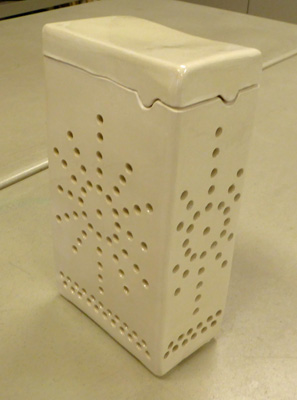
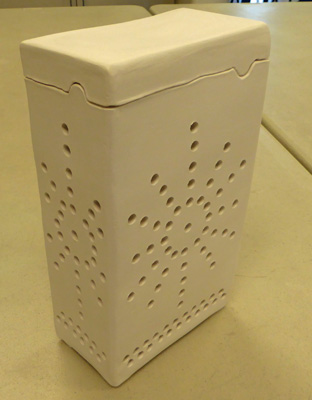
The lid stablized it nicely so it was much squarer and I had no cracks in the seams.
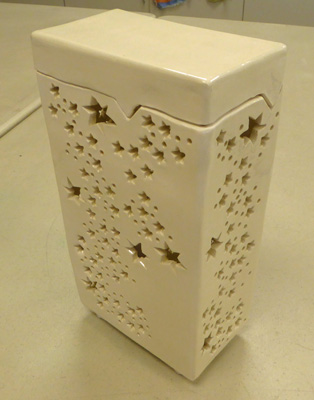
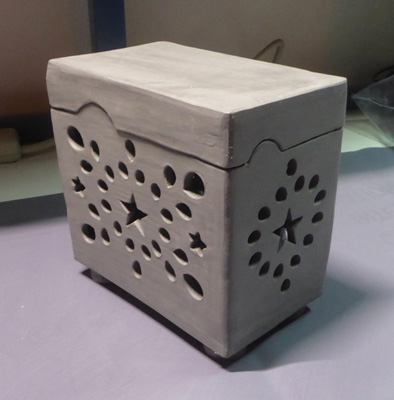
Having proved the concept to my satifaction I went on to try out using punches that weren't circles. That proved to be a rather big challenge. But with a great deal of struggle (and lots of mending of cracks) I produced luminaria #3 with stars and tiny circles.
And it lit up nicely too.

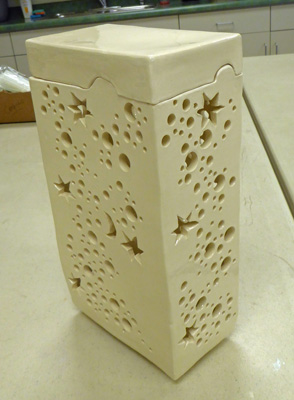
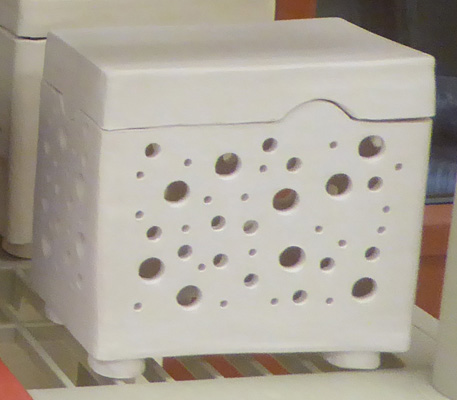
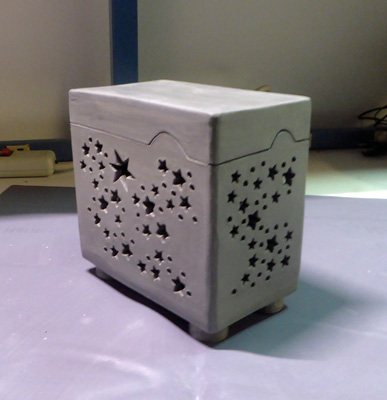
The next one had larger hand-cut stars and came through the construction process okay, only to shatter and collapse badly as it was loaded into the kiln.
I learned from this one that I really needed to have at least 1/4" between each punched out figure or the wide front sides just didn't have enough integrity to hold up.
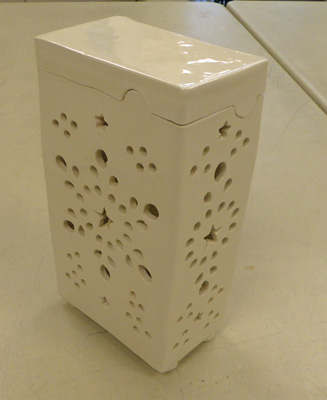
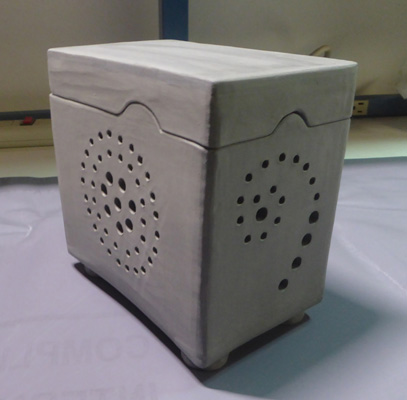
So I tried again, this time using more circles than stars and a bit more spacing (and a moon to add some variety).
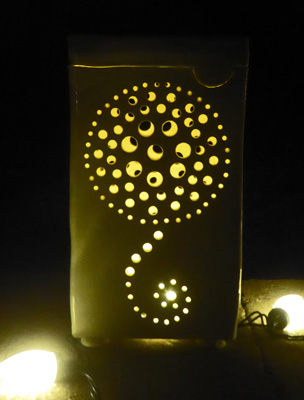
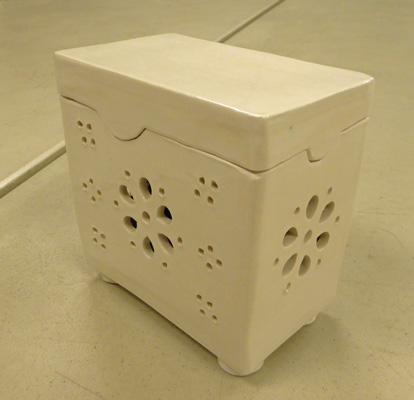
I had been cutting the patterns in these luminarias after they were constructed and been struggling with it. So the next one I made using the 'tar paper' method to hold the sides steady. While this is a great method for constructing things when they're very wet, it was not satisfactory with leather hard clay. But I did manage to get a nice looking luminaria out of the deal anyway.
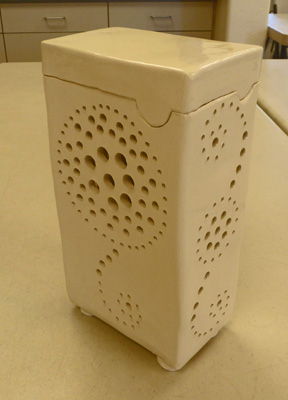
In fact this is one of my favorites and it lights up really nicely.
Tired of the struggle trying to cut patterns after assembly, I thought I'd try out cutting the pattern before assembly and see how it went.
Being a little gun-shy at this point, I decided I'd try the new technique with a half-sized luminaria and see how it went.
It went marvelously, and I really liked this smaller size too. So I decided instead of making 14 tall luminarias (which seemed like a rather tall order at this point in the season) I'd make 7 tall ones (just 2 more tall ones to go at this point) and 7 short ones (6 more to make).
All of them from this point on were made with the pattern cut into the pieces while they were flat and then assembled into the box form. Along the way I'd learned that it was much easier if I was patient and waited until the clay was really leather hard. No bowing. No sagging. You just have to use lots and lots of slip to make sure they stick together.
I happily made my second half-sized luminaria in the same weekend.
The next weekend I gave myself a break and only made 1 half-sized luminaria. I managed to get it bique fired before things shut down for the pandemic but not glazed. It's not my favorite but hey, it will light up nicely.
The next weekend I managed to make two more half-sized luminaria, one much in the same vane as the others.
And the other the test project for actually carving a design into the clay.
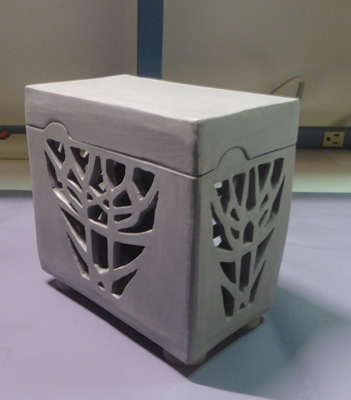
It's here that my 1/4" rule really paid off. Without it, a lacy pattern like this just won't make it.
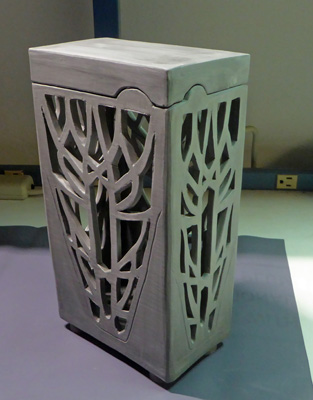
Having succeeded with this, the next weekend I made the full-sized version. It was touch a go here and there but I'm very excited about the results. This is what I'd hoped to be able to do when I set out to do this project.
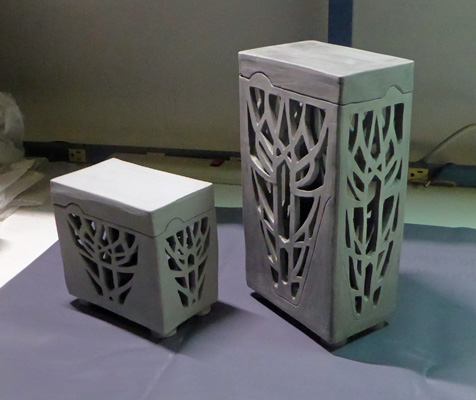
Here is the pair of them together.
I was now in the home stretch. I had two more half-sized luminaria to make to reach my goal. But life was getting complicated with the pandemic (and our new house being ready for delivery in Show Low) so I didn't push things and made just one more the next weeekend.
By this point the weather had begun to heat up too. The clay was drying faster and faster as I worked in my garage. The last weekend in March, I made the last half-sized luminaria collapsing the process into only 2 days because things dried so fast.
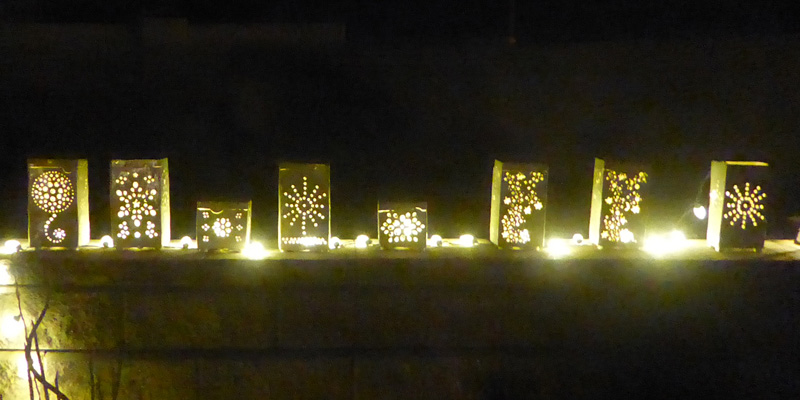
I put all the luminaria that had been fired out on a wall in our back wall and lit them up.
And that was it for the winter season for me. April was warm and I was busy with a new summer house that had just been delivered.
I left the unfired luminaria safely stored in the garage in hopes that they'd get fired in the fall when we returned.